Article by Gretchen Salois and appears in Modern Metals Magazine, September 2014
Above: A view of the AGT400’s C-frame from behind.
Optical sensors offer alternative to nuclear-based methods for thickness gauging
September 2014 – When talking radiation, red flags often pop up. News of reactor meltdowns and toxic leaks resulting in proverbial ghostlands like Chernobyl in Russia or seaside pollution in Fukushima, Japan, come to mind. But nuclear science serves a practical purpose when harnessed in a calculated and controlled environment.
Advanced Gauging Technologies LLC’s AGT400 isotope thickness gauge has been offered for the last 17 years and the company recently introduced its latest innovation in the form of the AGT800, a laser gauge the company believes will be the wave of the future for gauging thickness. Knowing the exact dimensions of material being processed can be both cost and time saving.
“Most service centers pay for their metal by weight. If the material they receive from their supplier is not the right thickness—let’s say they order 0.18 inch and receive 0.187 inch—they can end up overpaying or having to deal with an excessive amount of scrap,” says Steve Venters, sales manager for the Plain City, Ohio-based instrument maker.

The need for improved and reliable accuracy is only growing, especially in the aerospace, automotive, military and high-end electronics markets, adds Venters. “Many of these customers require reports and charts to verify the material thickness they receive is within specifications. The reports generated by a thickness gauge can also help a service center gain and maintain their ISO certification. Choosing a supplier that is ISO certified can often be a requirement for many end users.”
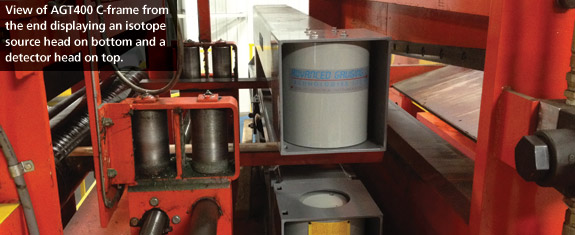
The major difference between the AGT400 and AGT800 is the method by which the gauges measure material thickness. The isotope gauge uses a radioactive source, Americium 241. This radioactive source is harnessed in a controlled environment and is enclosed in a source head located beneath the material being measured. Gamma rays are emitted when the source head’s shutter opens.
“The rays, which pass through the material are measured by a detector head located above the material which contains an ionization chamber,” Venters explains. “The gamma rays then ionize the gas atoms in the chamber and an electrical current is created. The AGT400 uses a unique algorithm and proprietary software to convert this electrical current into an accurate measurement of the material being processed.”
The AGT400 is best suited for material ranging in thickness from 0.007 inch up to 0.25 inch. “It depends upon the exact material being measured,” Venters says. The upper limit can also be increased to 0.312 inch thick when a larger ionization chamber is used in the detector head. It has a proven accuracy range of +/- 0.20 percent or +/- 0.0005 inch. Typically, the operating environment and the type of line the gauge is located on have no significant impact on the gauge’s accuracy.

The laser approach
Unlike the AGT400, the optical based system of the AGT800 laser gauge relies on advanced Keyence laser sensors to measure a material’s thickness. The Class II sensors are similar to the same sensors that scan bar codes at a retail store. “They do not generate heat and you can easily place your hand between the sensors and not feel a thing,” Venters says. “There are two sensors, one located above the material and one below it.” Each sensor sends a beam of light that strikes the material, which is then reflected back to the sensor’s receiving mirrors.
“The sensors know exactly how far each beam has traveled and they also know the exact distance between each other,” Venters continues. “This information is used to calculate with extreme accuracy the thickness of the material being measured.”
A third sensor can be added when the material passing between the sensors is not level. Mounted alongside the top sensor, it is
used to determine the passline angle of the material and then calculates the angle and applies a correction factor.

The AGT800 is designed to measure materials with a thickness range of 0.04 inch up to 0.75 inch, “although there are options available to measure thinner gauge materials as well,” he adds. The accuracy range of the AGT800 is less than 25 microns (0.001 inch). It is also alloy insensitive—it can measure virtually any type of material in coil, strip or sheet form. “Because the AGT800 uses laser sensors instead of a radioactive source, there are no costly and time-consuming government regulations required, such as leak tests,” Venters says.
Both the AGT400 and AGT800 feature automatic SPC reporting, data storage and offline data analysis. Data is stored on the gauge itself and can also be stored on a network server for easy recall of reports, Venters says. These reports provide graphic representation of the strip thickness over a coil or sheet’s length. “Both gauges will notify the operator immediately when a material’s thickness is out of tolerance,” Venters says.
Regulatory requirements
Like any isotope gauge, the AGT400 is subject to state and federal regulations, which require AM241 be tested for leaks once every six months “or once every two years if the source is in storage and not in actual service,” Venters says.
The trade-off of not having to comply with regulatory reports with the laser gauge is that the AGT800 requires a cleaner and more stable operating environment than its isotope counterpart. “Since it is an optical-based system, it is more sensitive to excessive dust, scaling and oil lubricants that are often present on some processing lines,” Venters explains. “It also requires a more stable passline and material flow to ensure the laser sensors are not damaged during line start up and tailouts.”
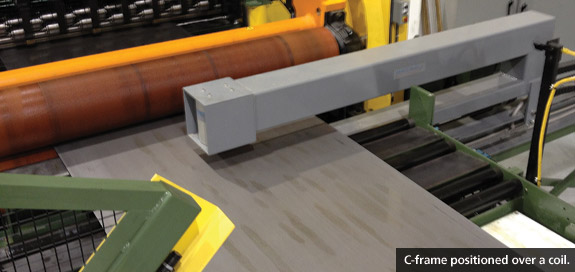
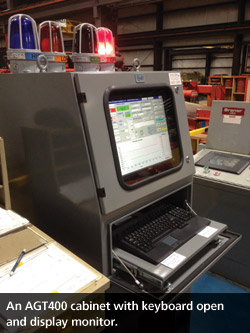
Both AGT model gauges have two primary components, an electronics cabinet and C-frame. The electronics cabinet contains an industrial grade computer, electronics shelf, monitor, printer, keyboard and a heavy-duty backup batter unit. The C-frame is positioned on the processing line and includes either a source and detector head (AGT400) or laser sensors (AGT800). “The C-frame will also have two Photoeye sensors which allow the C-frame to know when it reaches the edge of a coil,” Venters says. “A tachometer is also used to measure the footage of the material being processed.” MM