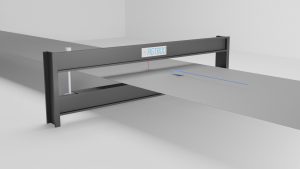
The AGT800 Extrusion (Fig. 1) is the next evolution in thickness measurement for plastic sheet extrusion. It provides accurate and reliable real time measurement of sheet thickness and width on the processing line. While also providing the sheet thickness profile by adjustment die bolt location. This allows for quick accurate adjustment to equalize the sheet thickness across the width.
Our dual laser technology scans the sheet from above and below providing accurate thickness measurements on uneven and oscillating sheets. The O-frame design of this gauge allows three times the scanning speed of an oscillating C-frame gauge. This design also provides a solid and stable foundation for highly accurate measurements. To ensure correct measurements
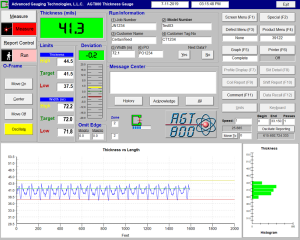
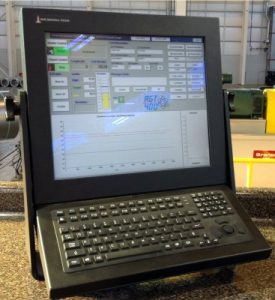
During normal operation, an interactive display shows real-time graphical representations of measured thickness, deviation, and a histogram of thickness values for the current run. Also displayed are thickness, width, target, upper and lower limits for both thickness and width, job number, customer ID, batch number, and much more. (Fig. 2)
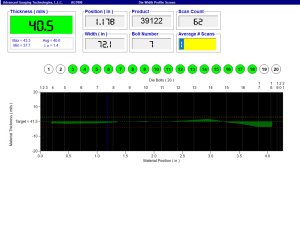
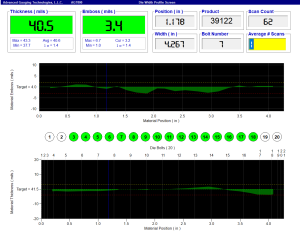
The thickness profile screen shows the thickness by die bolt position (Fig. 3). This screen can open over the main screen or can be shown on a separate display. This will help to avoid thickness evenness quality issues as material density changes. Digital warning outputs on the AGT800 Extrusion can alert you to issues that can have an effect on your process.
An additional benefit of the laser thickness gauge is the thickness measurement is not subject to material density. Isotope and X-ray gauges will show a thickness change when the density of the sheet changes, providing false information.
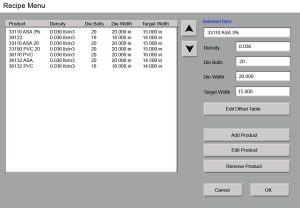
Our comprehensive Recipe Menu (Fig. 4) includes entries for material density, the number of die bolts, target width of the sheet and die down for each product entered. From there die width and gauge down are automatically calculated. The gauge can be used to measure hot or cooled material. Because the material can swell or shrink during cooling each entry also includes a set of offsets to represent the thickness as a cooled measurement. Both values are saved for later analysis. This helps with hot measurement acceptance of the gauge.
For lines that include embossing we offer an optional embossing depth measurement (Fig. 5). This option includes a third pinpoint laser that measures the embossing depth across the sheet. Real-time and Average depth are displayed and recorded along with the across sheet depth profile.
Direct benefits realized through these non-contact thickness measurements include documented compliance with ISO9001 and other quality specifications, improved process control, increased productivity and scrap reduction.
For long term record keeping the AGT800 Extrusion sheet thickness gauge will produce end of run reports with production, S.P.C. data, thickness and profile graphs. These reports can be recalled on screen, printed at the gauge or saved as a PDF on the gauge or on a network drive.
Features
Our simplified hardware design combined with Keyence ultra high speed, high accuracy laser sensors, make the AGT800 Extrusion the most reliable laser gauge in the industry. The measurement system utilizes the latest in technology, reducing the requirement for peripheral hardware. The system configuration provides a very reliable platform for thickness measurement and S.P.C. reporting.
All digital inputs and outputs, analog inputs, and power supplies can be monitored simultaneously in real-time on a single screen. This feature provides for a means of greatly simplified troubleshooting.
Our development engineers tested more than a dozen laser sensor models from five different countries and made the decision to manufacture all A.G.T. laser thickness gauges with high-end Keyence thickness measurement sensors. These are the fastest sensors in the world, and they produce the highest possible accuracy and repeat ability. This translates to the most consistent and stable thickness measurements possible.
The system automatically generates several reports, providing all the information you need in user friendly formats.
All coil data is automatically stored to disk. Any desired information can be easily and conveniently accessed at any point in the future, and the respective reports reprinted with relative ease.
The system is fully capable of network data storage, remote printing and control. Auto Data Gathering can be used to automatically position the C-Frame, start the measurement and reporting function. Auto Data Entry can be used to automatically enter coil data. Using both functions simultaneously, the AGT800 Extrusion can run itself with no operator intervention.
Diagnostic Data
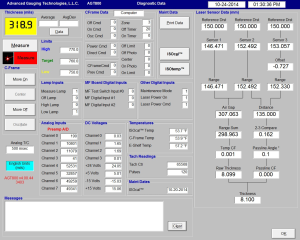 Advanced Gauging Technologies is a service oriented company, and for that reason we’re proud that all our thickness measurement gauges have incredibly useful built-in diagnostic features. The diagnostic Data Screen shows the real-time status of all digital and analog I/O, nominal and actual power supply voltages, and much more. All the major test points in the system are displayed simultaneously, making troubleshooting a very straightforward process. This screen can easily be printed and emailed or faxed to A.G.T. for troubleshooting assistance.
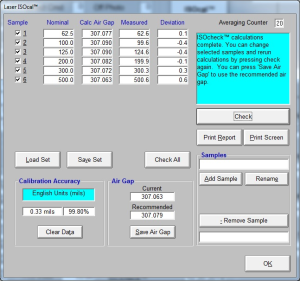
Calibration
Options
Includes an additional remote monitor, keyboard, and touchpad mouse.
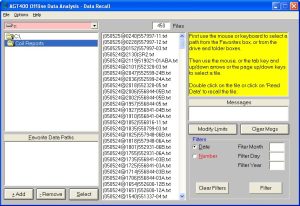
Allows easier access to coil reports by enabling the recall of reports from a single or multiple gauges simultaneously via a company network or USB stick. Reports can be accessed without interrupting the gauge measurement or line operation. Also allows coil reports to be formatted as PDF files.
Standard system includes a 17″ LCD flat screen. Optional monitors include a 17″ remote flat screen unit, and a touchscreen.
To replace the standard system local printer.
Specifications
Real World Specifications |
||||
| AGT800 Extrusion | ||||
|---|---|---|---|---|
| Thickness Range | 0.10 to 10 mm.(.004 – .400″) | |||
| Air Gap | 119.38 mm. (4.70″) | |||
| Measurement Range | ± 25 mm. (± 1.00″) | |||
| Calibration Accuracy | < 5.3 μm (.21 mils) (.00020″) | |||
| Resolution | 1μm (.04 mils) | |||
| Linearity | ± 14.4.0 μm (± .57 mils) | |||
| IEC/IFDA (CDRH) Laser Class | Class 2/Class II | |||
| Analog Output Resolution | 1 µm | |||
| Precision (noise) | ~ 5 µm | |||
| Temperature Range | 0 to 50° C (32 to 122° F) |
|||
| Relative Humidity Range | 35 to 85% (no condensation) | |||
