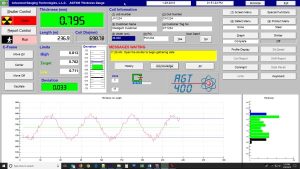
Our AGT400™ Isotope Non-Contact Thickness Measurement and S.P.C. Reporting System has been specifically designed for the metals industry. Using the latest in computer technology we can provide fast and reliable thickness measurements and S.P.C. reporting for strip and sheet material. Many direct benefits of our thickness measurement equipment include documented compliance with ISO9001 and other quality specifications, increased productivity, improve part quality with verified material thickness, improved process control, and scrap reduction. Our standard system also includes disk storage and easy recall of all coil S.P.C. information. This eliminates your need to maintain large files of printer paper for long-term record keeping purposes.
Many people think that isotope gauges are outdated old technology. But in applications where metals are dirty, oily, covered with scale, or have large passline oscillations the AGT400™ isotope gauge will out perform the newer technologies. Our operation and calibration software is so easy and intuitive to use most customers never even open the manual.
Contact us today to get an AGT400™ in your plant
Operational Functionality
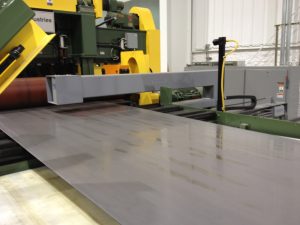
Our equipment operates according to the scientific principle that a low power radiation beam is absorbed by matter at a rate varying with its composition and thickness. As the material passes between the radiation source and detector head, thickness variations cause measurable changes in the amount of radiation reaching the detector head. The system is calibrated based on these variations, allowing it to provide continuous, high speed, accurate and reliable non-contact thickness measurement.
Features
Reliability
Our simplified hardware design provides increased system reliability. The measurement system utilizes the latest in technology, to reduce the requirement for peripheral hardware. The system configuration provides a very reliable platform for thickness measurement and S.P.C. reporting.
Our simplified hardware design provides increased system reliability. The measurement system utilizes the latest in technology, to reduce the requirement for peripheral hardware. The system configuration provides a very reliable platform for thickness measurement and S.P.C. reporting.
Automatic Calibration
Our system features fast and accurate method, called ISOcal™. Combined with our AutoComp™ feature, using Alloy specific calibration curves, the result is extremely accurate measurements of a wide variety of material compositions and coatings.
Our system features fast and accurate method, called ISOcal™. Combined with our AutoComp™ feature, using Alloy specific calibration curves, the result is extremely accurate measurements of a wide variety of material compositions and coatings.
Easy Installation
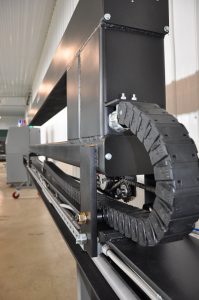
No requirement for air or water. C-frames typically mount on two pedestals but can be adjusted in a variety of ways to fit your needs.
No requirement for air or water. C-frames typically mount on two pedestals but can be adjusted in a variety of ways to fit your needs.
Accuracy
State-of-the-art high-speed electronics and logarithmic linearization assure highly accurate reading of various metals. This translates to consistent and stable thickness measurements.
State-of-the-art high-speed electronics and logarithmic linearization assure highly accurate reading of various metals. This translates to consistent and stable thickness measurements.
Automatic Reporting
The system automatically generates several reports, providing all the information you need in user friendly formats.
The system automatically generates several reports, providing all the information you need in user friendly formats.
Data Storage
All coil data is automatically stored to your gauges hard drive. Any desired information can be easily and conveniently accessed at any point in the future, and the respective reports reprinted with relative ease.
All coil data is automatically stored to your gauges hard drive. Any desired information can be easily and conveniently accessed at any point in the future, and the respective reports reprinted with relative ease.
Diagnostics
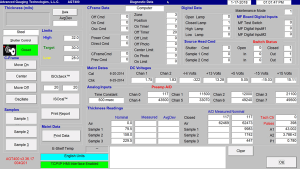
All digital inputs and outputs, analog inputs, and power supplies can be monitored simultaneously in real-time on a single screen. This feature provides for a means of greatly simplified troubleshooting.
All digital inputs and outputs, analog inputs, and power supplies can be monitored simultaneously in real-time on a single screen. This feature provides for a means of greatly simplified troubleshooting.
Upgradeability
Our unique thickness measuring instruments enables future upgrades to be performed in the field in just a matter of minutes.
Our unique thickness measuring instruments enables future upgrades to be performed in the field in just a matter of minutes.
Calibration
The AGT400™ uses ISOcheck™, which is the most advanced calibration routine available on the market today. This procedure can be performed in less than five minutes. N.I.S.T. certified samples are placed on a custom fabricated sample holder. Data is calculated and statistical outliers are automatically removed by the program. The calibration is then determined using all valid data points, and C-frame temperature is stored at that time. Once the calibration is saved, all future measurements are temperature compensated to automatically account for expansion and contraction of the C-frame. The thickness gauge also includes ISOcal™ that uses on board samples for complete calibration.
Options
Oscillating C-Frame
The oscillating c-frame option provides more complete information as it scans the thickness across the width of the sheet instead of just one or two points. The oscillating configuration equips the gauge with additional logic and control circuits enable the gauge to automatically sense the strip edges and scan from one edge to the other. In this configuration, the Profile Display Screen and Reports are enabled, which show a strip cross-section of thickness versus width.
The oscillating c-frame option provides more complete information as it scans the thickness across the width of the sheet instead of just one or two points. The oscillating configuration equips the gauge with additional logic and control circuits enable the gauge to automatically sense the strip edges and scan from one edge to the other. In this configuration, the Profile Display Screen and Reports are enabled, which show a strip cross-section of thickness versus width.
Coil Mapping
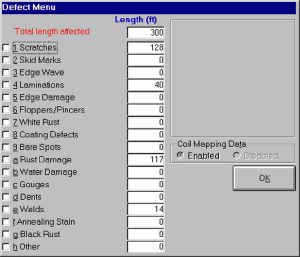
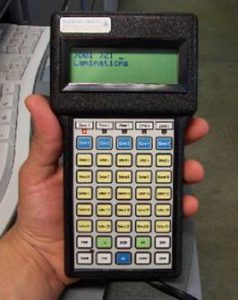
Allows inspectors a convenient method of logging strip defects as they are spotted. Available in single or dual handheld keypad configuration, for one or two-sided inspection lines. Read More
Allows inspectors a convenient method of logging strip defects as they are spotted. Available in single or dual handheld keypad configuration, for one or two-sided inspection lines. Read More
Offline Data Analysis
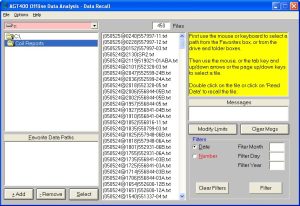
Allows easier access to coil reports by enabling the recall of reports from a single or multiple gauges simultaneously via a company network or USB stick. Reports can be accessed without interrupting the gauge measurement or line operation. Also allows coil reports to be formatted as PDF files.
Allows easier access to coil reports by enabling the recall of reports from a single or multiple gauges simultaneously via a company network or USB stick. Reports can be accessed without interrupting the gauge measurement or line operation. Also allows coil reports to be formatted as PDF files.
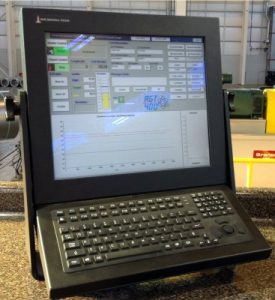
Remote Operator Control Station
Includes an additional remote monitor, keyboard, and touchpad mouse.
Includes an additional remote monitor, keyboard, and touchpad mouse.
Video Monitors
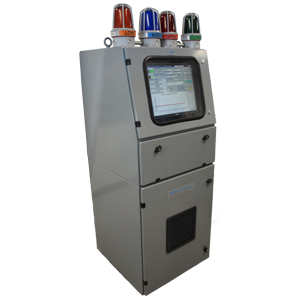
Standard system includes a 17” LCD flat screen. Optional monitors include a 17” remote flat screen unit, and touchscreen.
Standard system includes a 17” LCD flat screen. Optional monitors include a 17” remote flat screen unit, and touchscreen.
Remote System Printer
To replace the standard system local printer.
To replace the standard system local printer.
Specifications
| Thickness Range | .18 to 6.35 mm (.007 to .250″) steel |
| 2.24 to 10.16 mm (.088 to .400″) aluminum | |
| .13 to 4.19 mm (.005 to .165″) copper, brass, nickel | |
| .48 to 10.16 mm (.019 to .400″) titanium | |
| Air Gap | 2″ – 8″ (7″ nominal) |
| Measurement range | +/- 51 mm (+/- 2.01″) |
| Calibration Accuracy | ± 0.2% or ± 0.0005″ (whichever is greater) over .007″ – .250″ (steel) |
| Precision | .12% @ 3.0 mm thickness, .18% @ 4.6mm thickness, .33% @ 6.4 mm thickness, with 250 ms time constant & 90% confidence |
| Linearity | < .10% over .2 to 6.4 mm thickness range |
| Temperature Range | 0 to 50 deg C (32 to 122 deg F) |
| Humidity Range | 35 to 85% (no condensation) |
| Radiation Source | Am241 – 1 Curie |
| Radiation Detector | Ionization Chamber – 3″ diameter (4″ optional) |
Additional Information
